Culled from : Natural hair on a budget.
As the title of the post suggests, I’m sharing a much easier method of making your own lace closure for your braids wig like I talked about in the first tutorial post I did. If you haven’t already read that post, you should check it out as I won’t be repeating the basics here but just showing you how you can make the lace closure for your braids wig in a much faster way while still getting the same result.

This method is an affordable alternative to using a ventilated human hair lace closure for your wig and will guarantee a neat looking closure. Although there are other methods such as the latch-hook method which I might be sharing soon. So keep reading to find out how.
- First step is to sew down the lace you’re using on the wig cap. For those who’ve been asking, the Swiss lace is popularly used to make lace closures. But since we aren’t ventilating, you could use a good alternative such as the Veil net like the one I used in this post.

- Using this method, you would pass some thread through a large needle (I doubled the thread twice to make it thick) knotting the ends.

- Pass this through the lace, then take the piece of attachment you want to braid and attach it to the lace by passing the thread over it a couple of times for security and tie a knot.

- Cut the rest of the thread but make sure to leave little thread after the knot.

- Take some more extension and start braiding or twisting the it along with the thread you didn’t cut. This is probably the most important part of the process. Braiding the extension with some thread at the beginning ensures that the knot doesn’t loosen and the braids don’t start falling out. Trust me I learnt this the hard way..


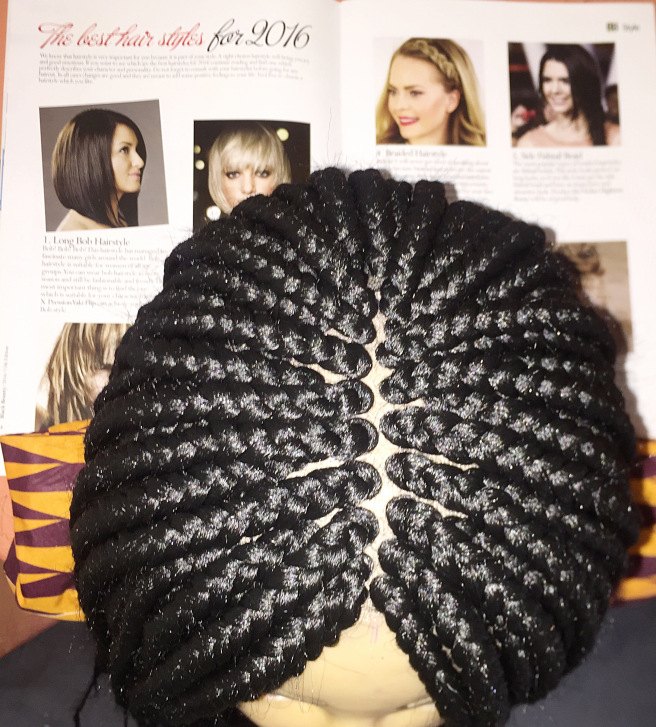
- Braid the hair till the end and repeat the process till you’re done.
This method is really easy as well as secure. It also ensures that the lace doesn’t rip which is very important. I use this for clients who don’t purchase the ventilated lace closures. Some people who don’t know have asked what the difference is because from a distance, it looks pretty much the same. As always, I’m here to provide more affordable alternatives to growing healthy hair on a budget.
The thread passed through one needle can be used for over 5 braids depending on the length of the thread so you don’t have to keep re-threading.


just throwing this in for good measure.
Tips:
- Make sure to do a test by pulling on the braids to make sure they are secure especially if you’re doing this for a client.
- When you start braiding, start in such a way that the extension covers any thread that may be showing and trim off any nuisance lol.
- You could use this method to make the whole wig and not just the closure. Saves more time than the one in my last tutorial. If you’re using coloured extensions, you could use that colour of thread if you’re worried about the thread showing at the root of the braids.
- When purchasing the lace for the closure, choose a color that’s close to your skin tone so it won’t be obvious or you could purchase a wig cap that comes with lace at the front. It works just fine.